Create Script
Search for Windows PowerShell ISE and run the integrated editor.
Click on File menu.
Select the New option to create a new empty .ps1 file
Verify execution Policy
Run powershell as administrator.
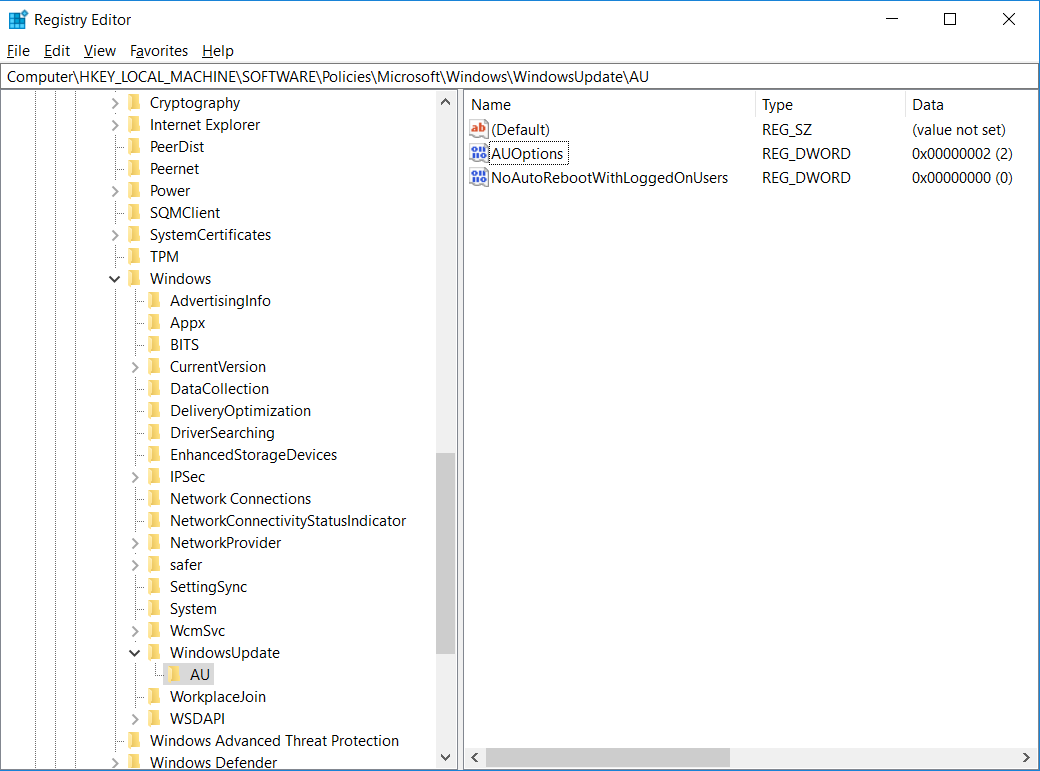
Set-ExecutionPolicy RemoteSigned
On Windows 10, PowerShell includes four execution policies, including:
- Restricted — Stops any script from running.
- RemoteSigned — Runs scripts created on the device. However, scripts created on another computer won’t run unless they include a signature of a trusted publisher.
- AllSigned — All the scripts will run as long as they’ve been signed by a trusted publisher.
- Unrestricted — Runs any script without any restrictions.
Execute script
Execute command
& "C:\PATH\TO\SCRIPT\name_of_script.ps1"